Decadent Homemade Ice Cream Recipe – Coffee Can Magic!
Step right up, ladies and gentlemen, and let me introduce you to one of the easiest, most delicious homemade ice cream recipes you’ll ever make – coffee can ice cream! If you’re a coffee lover like myself, then you won’t want to miss out on this delectable treat.
You might be thinking, “Why make my own ice cream when I can buy it at the store?” Well, let me tell you, there’s something magical about creating your own homemade ice cream. Not only do you get to control the ingredients and tailor it to your taste buds, but it’s also a fun activity for kids and adults alike.
This coffee can ice cream recipe is perfect for those hot summer days when all you want is something cold and refreshing. The best part? You only need a few simple ingredients that you probably already have in your kitchen.
So, why not kick back and enjoy an icy-cold bowl of coffee goodness? With this recipe in hand, you’ll be enjoying the taste of homemade coffee ice cream in no time.
Why You’ll Love This Recipe
If you’re a coffee lover like me, then you’ll fall in love with this Coffee Can Ice Cream Recipe. Not only is it easy to make, but the resulting ice cream is rich and creamy with that unmistakable coffee kick that’s perfect for summer days or anytime you need a coffee fix.
Some of the reasons why you’ll love this recipe include its versatility. You can customize it to your taste by adding extra flavors like chocolate chips, caramel, or even Bailey’s Irish Cream for an adult version. Besides that, it’s a great treat for kids to enjoy and experiment with using smaller coffee cans. There’s no limit to the number of variations you can make with this recipe.
Also, this homemade coffee ice cream doesn’t require an expensive machine or any fancy equipment. You just need a few simple ingredients like instant coffee granules, heavy cream, sugar, and vanilla extract. All of these ingredients are readily available in most kitchens.
So, whether you’re planning a weekend barbeque with friends or just looking for a way to cool down after a hot summer day, this homemade ice cream is perfect for any occasion. I promise once you try this Coffee Can Ice Cream recipe; you’ll fall in love with it and want to make it over and over again!
Ingredient List

Here are the ingredients you will need to prepare homemade coffee-flavored ice cream that you can make with minimal effort and basic equipment.
Ingredients 1:
- 2 cups (480ml) whole milk
- 1 cup (240ml) heavy cream
- 3/4 cup (150g) granulated sugar
- 1/2 cup (40g) instant coffee granules
- Pinch of salt
- 6 large egg yolks
- 1 tsp (5ml) vanilla extract
Ingredients 2:
- 2 cups (480ml) heavy whipping cream
- 1 pint (470ml) half-and-half
- 3/4 cup (150g) granulated sugar
- 2 tablespoons (20g) instant coffee granules
- Pinch of salt
- 3 tablespoons (45ml) cold-brew coffee or espresso
- 1 teaspoon (5ml) vanilla extract
Ingredients 3:
For those who prefer chocolate-flavored or vegan coffee ice cream, here are some substitutions and variations:
Chocolate Chip Coffee Ice Cream:
- Follow the recipe ingredient list for coffee ice cream above.
- Add in 1/4 cup (60g) chocolate chips to the mixture when it is almost freezing.
No-Churn Vegan Coffee Ice Cream:
- Use coconut cream instead of heavy cream.
- Use condensed coconut milk instead of half-and-half.
- Substitute egg yolks with arrowroot powder, cornflour, or xanthan gum.
Dairy-Free Iced Coffee Flavored Ice Cream:
This recipe uses coconut milk to create a dairy-free version of the coffee ice cream.
- Combine one can of whole coconut milk, one large ripe banana, and two teaspoons (10 ml) instant coffee in a blender.
- Blend until smooth and freeze in an ice cream maker according to the manufacturer’s instructions.
The Recipe How-To
Now that you have gathered all the necessary ingredients, let’s start making our Coffee Can Ice Cream!
Step 1: Making the Coffee Mixture
First, we need to make the coffee mixture. In a mixing bowl, place 2 cups of whole milk and 3/4 cup of granulated sugar. Stir until the sugar is dissolved. Then, add in 2 tablespoons of instant coffee granules and whisk until it is well-combined.
Step 2: Preparing the Eggs
Crack 4 large eggs and separate the yolks from the whites. Save the whites for something else (you can actually freeze them for later use). In another mixing bowl, beat the egg yolks with a fork.
Step 3: Combining Milk and Eggs
Slowly pour the coffee mixture into the bowl of egg yolks while continuously whisking. This process avoids scrambling the egg yolks. Once combined, pour everything back into the pot where you heated your milk and sugar earlier.
Step 4: Cooking the Mixture
Over medium heat, mix the ingredients together while continuously stirring. Cook until it thickens and coats your spoon evenly. This should take roughly around 10 minutes.
Step 5: Cooling Down
Remove from heat and let it cool down for a few minutes. Then, cover it with plastic wrap by pressing down onto its surface to avoid forming a skin on top. Chill in your refrigerator for at least an hour.
Step 6: Churning Process
After chilling, pour your mixture into your ice cream maker – following its instructions – and churn for about 20-30 minutes until it reaches soft-serve consistency.
Step 7: Creating Coffee Ice Cream
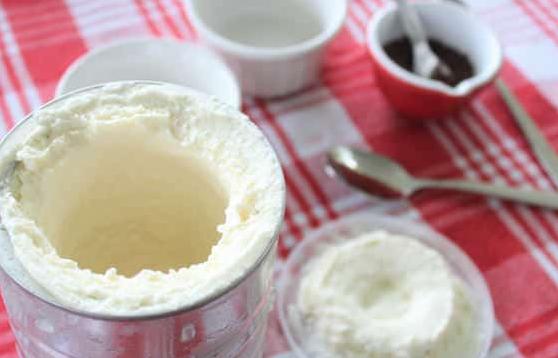
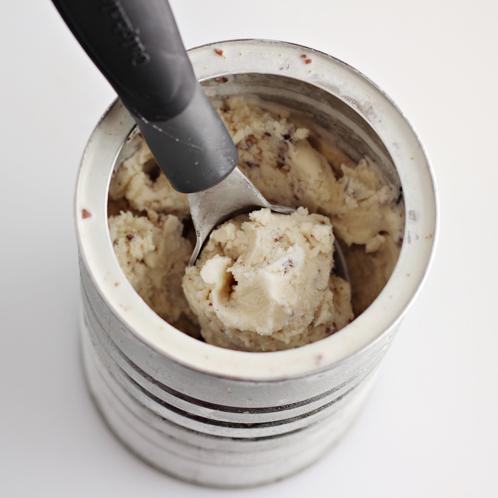
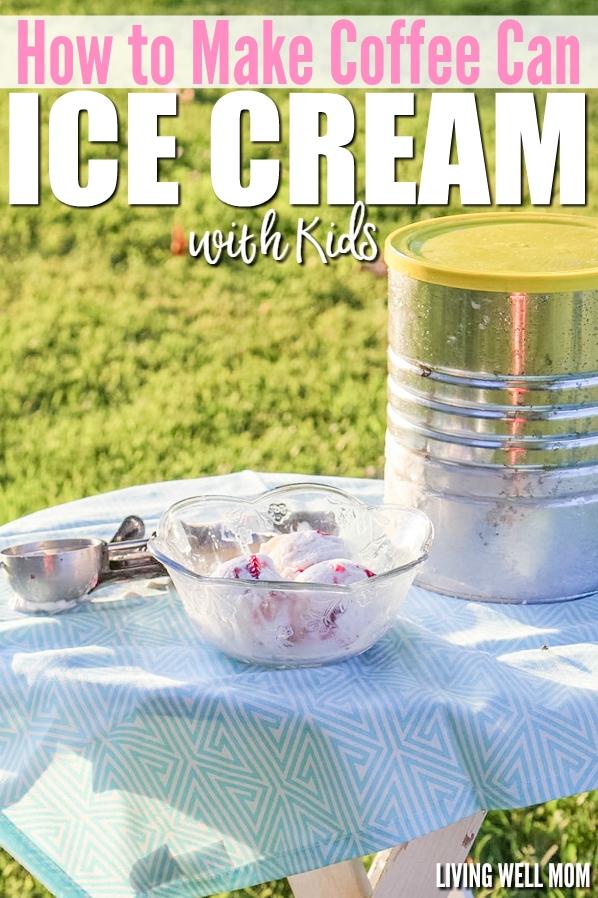
Transfer to a container such as an empty coffee can, cover with a lid or plastic wrap and freeze for a couple of hours or overnight until it hardens.
Step 8: Scoop and Enjoy
And voila! You now have your very own Coffee Can Ice Cream. Scoop it, create ice cream sandwich, or even blend it to make a milkshake – this coffee ice cream is perfectly versatile and can be enjoyed in countless ways.
Substitutions and Variations
If you want to mix things up a bit, or if you have certain dietary restrictions, there are several substitutions and variations you can try with this coffee can ice cream recipe.
Firstly, if you prefer a dairy-free option, you can substitute the heavy cream for full-fat coconut milk or almond milk. This will give the ice cream a slightly nutty flavor that pairs well with coffee.
For a vegan coffee can ice cream, swap out the egg yolks for 1/3 cup of aquafaba (the liquid from a can of chickpeas) or 1/2 cup of silken tofu blended until smooth. This will help thicken the ice cream and provide a creamy texture without using any animal products.
If you’re looking for a stronger coffee flavor, add one to two tablespoons of instant coffee granules to the recipe ingredients. You can also swap out some of the milk for cold brew coffee or espresso for an extra kick of caffeine.
For a chocolate chip coffee ice cream, sprinkle in some dark chocolate chips during the last few minutes of churning. You could also experiment with other flavored add-ins like caramel sauce, nuts, or cookie crumbs.
If you don’t have rock salt on hand for the ice bath, you can use kosher salt instead. Just make sure it’s finely ground so it dissolves easily in water.
These are just a few suggestions for how to switch up this delicious coffee can ice cream recipe – feel free to get creative and make it your own!
Serving and Pairing
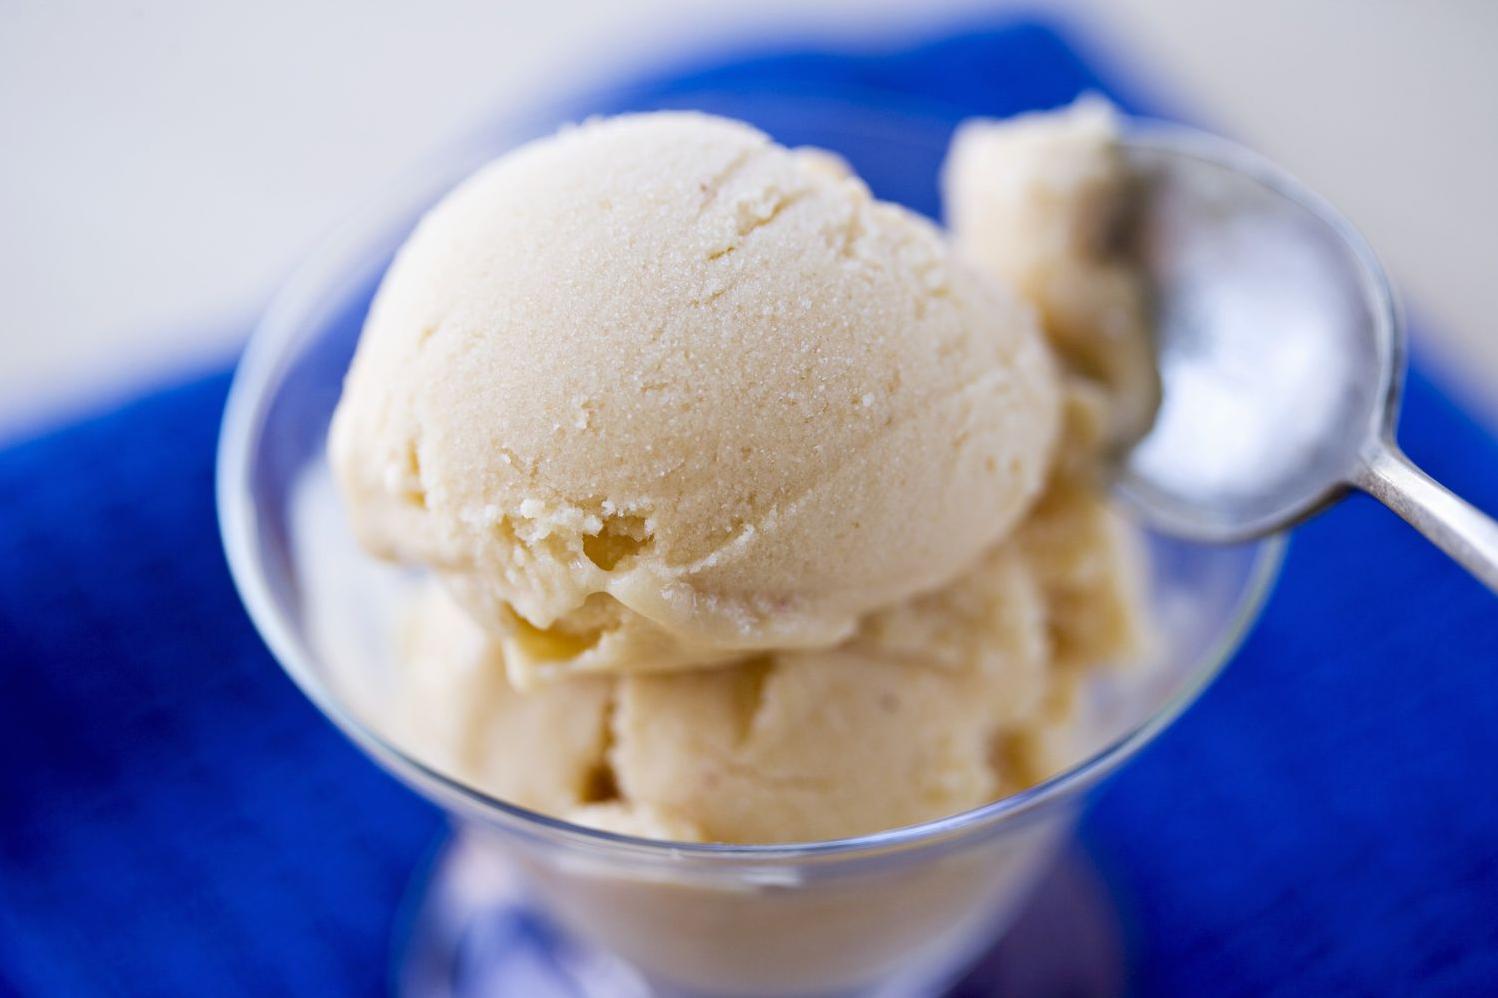
Coffee can ice cream is best enjoyed when it is served cold, right out of the freezer. The texture of this ice cream is creamy and smooth, with a burst of coffee flavor that will awaken your taste buds. You can serve it in a bowl, cone, or even with a dollop of whipped cream on top.
For pairing options, I recommend enjoying this ice cream with a cup of hot coffee. It’s the perfect combination to satisfy your caffeine craving! You can also pair it with desserts that complement its rich flavor, such as chocolate chip cookies or brownies.
If you’re feeling extra indulgent, try drizzling some chocolate syrup or caramel sauce on top of your scoops of coffee can ice cream. This will add an extra layer of sweetness and richness that will take your dessert experience to the next level.
This ice cream recipe is also a great addition to any family gathering or party. Children and adults alike would love its delightful taste and texture. You can even get creative with its presentation by serving it in coffee cans or small cups for an added touch of nostalgia.
No matter how you decide to serve this homemade coffee ice cream, one thing is for sure – it’s bound to be a crowd-pleaser and will definitely kick your sweet tooth into gear!
Make-Ahead, Storing and Reheating

Making ice cream at home can be time-consuming, but we’ve got you covered! If you’re planning on serving the coffee ice cream for a special occasion or simply want to have a batch on hand for later, follow these guidelines on how to make-ahead and store it properly.
To make-ahead:
Once the coffee ice cream has set in the freezer for at least 4 hours or overnight, remove it from the freezer and let it sit at room temperature for 10-15 minutes before scooping. This will soften the ice cream slightly and make it easier to scoop. Scoop the ice cream into a lidded container and return it to the freezer.
To store:
Homemade ice cream can last up to two weeks in the freezer, but it’s best consumed within the first week for optimal flavor and texture. Store your coffee ice cream in a lidded container, ensuring there is as little air as possible inside. Air exposure can cause freezer burn, resulting in small crystals forming on the surface of your ice cream.
To reheat:
If your homemade coffee ice cream has become too frozen, place it in the refrigerator for 10-15 minutes before serving. Alternatively, you can microwave individual scoops of the ice cream for 10-15 seconds in 5-second intervals until they reach a softened consistency. Be sure not to overheat them, as this could cause them to melt.
Following our recommended steps will ensure that your homemade coffee ice cream is always ready-to-eat and enjoyable whenever cravings arise.
Tips for Perfect Results
To achieve the best result for this coffee can ice cream recipe, here are some tips to follow.
Firstly, it’s important to chill your cream and other ingredients thoroughly before use. This will make it easier to whip up into a thick consistency and will also help the ice cream freeze evenly.
If you find that your homemade ice cream is freezing too hard, try increasing the sugar content slightly or adding a tablespoon of alcohol like vodka or rum to keep the mixture from freezing solid.
When making coffee ice cream, be sure to use high-quality coffee beans or instant coffee granules for the strongest flavor. If you want to really kick it up a notch, you can even use some cold brew concentrate instead of regular brewed coffee for an extra boost of caffeine.
If you’re looking for a vegan or dairy-free option, try using coconut milk or almond milk instead of heavy cream. You can also substitute condensed milk for whipping cream if desired.
When churning the ice cream, be sure not to overfill your ice cream maker as it could lead to leaks or uneven freezing. Also, don’t skimp on the rock salt when making ice cream – it helps to lower the freezing point and create smoother, creamier ice cream.
Lastly, be creative with your flavors and mix-ins! Try adding chunks of chocolate or swirls of caramel sauce to your coffee flavored ice cream for an extra indulgent treat. With these tips in mind, you’ll be sure to impress your family and friends with your homemade coffee can ice cream!
Bottom Line
In conclusion, this coffee can ice cream recipe is a perfect way to kick up your ice cream game and impress your loved ones with homemade coffee ice cream. It’s easy to make and requires only a few ingredients that are readily available in every household. However, don’t let the simplicity fool you; this recipe packs a punch of flavors and brings the cafe straight to your kitchen.
By using the right combination of sugar, heavy cream, and coffee granules, you can create a rich and creamy coffee-flavored ice cream that perfectly balances the sweetness with the bitterness of coffee. Moreover, this recipe offers you the flexibility to customize it according to your taste preferences, by adding chocolate chips or substituting heavy cream with vegan options.
In addition to being delicious, the coffee can ice cream recipe is also an excellent opportunity for some quality family time. Involve your kids in making this easy yet rewarding recipe by following our kids’ instructions section. They will surely love churning their homemade ice cream like they saw in the movies.
So next time you crave some refreshing dessert, try making this coffee can ice cream and surprise your family or friends with a delicious treat that’s homemade with love.

Coffee Can Ice Cream Recipe
Ingredients
Vanilla ice cream
- 1 cup heavy cream
- 1 cup light cream
- 1 beaten egg (or use equivalent reconstituted dried)
- 1/2 cup sugar
- 1 teaspoon vanilla extract
Chocolate Ice Cream
- 1 cup heavy cream
- 1 cup light cream
- 1/2 cup sugar
- 4 tablespoons cocoa
- 1/2 teaspoon vanilla extract
- 1/8 teaspoon salt
Coffee Ice cream
- 1 cup heavy cream
- 1 cup light cream
- 2 tablespoons instant coffee granules
- 1/2 cup sugar
- 1/8 teaspoon salt
Instructions
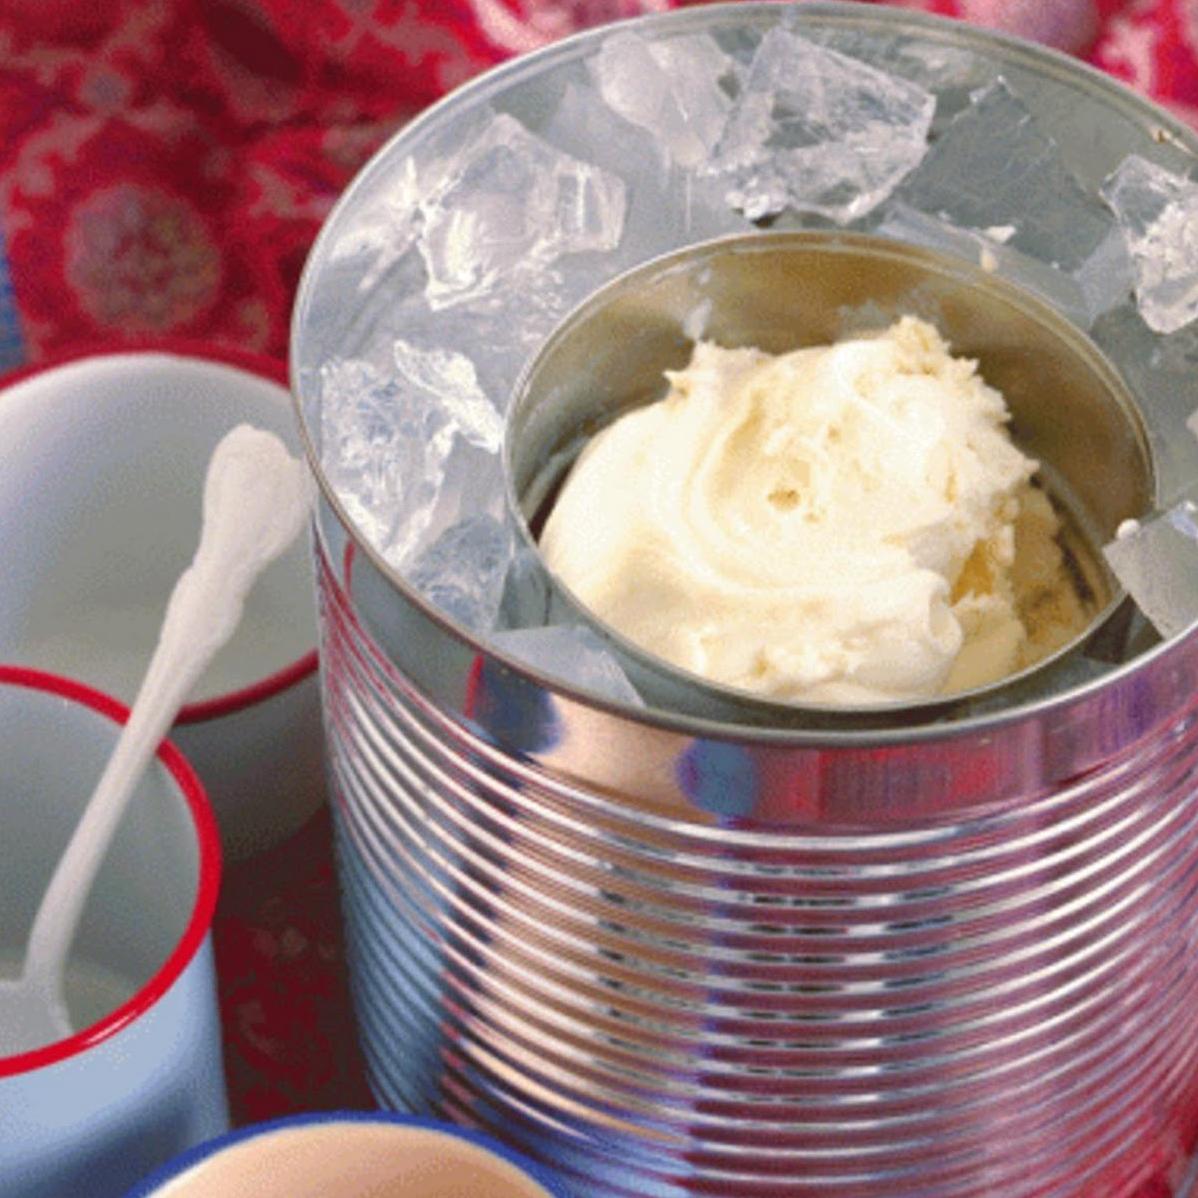
- You will also need: 1 small coffee can (1 lb. can) and 1 large coffee can (3 lb. can).
- In 1 lb. coffee can mix all ingredients.
- Seal can lid well with duct tape.
- Put small, sealed can inside larger 3 lb. can.
- Pack ice and 1 cup salt around small can.
- Put lid on large can and duct tape closed.
- Roll back & forth on a large towel (optional) for 15 minutes.
- Open large can and dump ice and water.
- Wipe small can dry and open. Stir mix, scraping sides of can.
- Additional ingredients, eg. cookie crumbs, chopped nuts, can be added now.
- Reseal small can and place back in larger can.
- Repack with salt and ice.
- Continue rolling for 10 minutes more.
- Open large can and dump ice and water.
- Wipe small can dry and open.
- Enjoy!